Summer, to me, is always defined by the fruits it has to offer. While I lived in India, it was the one and only Mango.
Here, it conjures up images of plums, apricots, cherries and berries of several kinds. I know spring is moving on and summer is round the corner, when I start seeing baskets of cherries and strawberries in year-long farmer’s markets – one of the perks of living in sunny California.
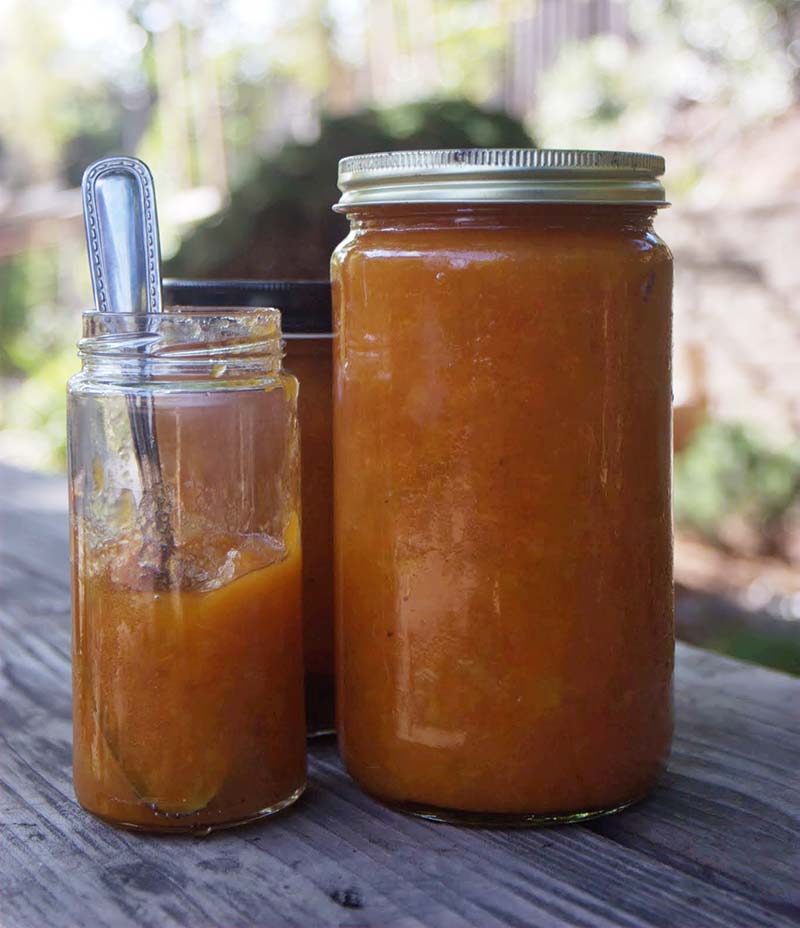
Apricot Jam
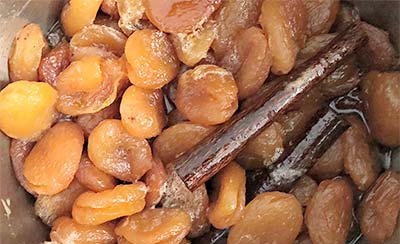
There are two apricot trees in my friend’s backyard and the trees are fully laden with fruits in the summer. I was given several baskets that were ripening at a faster pace than we could consume. I did not want these delicious home-grown fruits to go waste and so decided to make jam with them. It is really easy to pit apricots as they are big (unlike cherries) and firm (unlike plums). In addition, the skin is so thin that there is no need to peel it.
Guest Chef: A-kay
Ingredients
- Apricots – 3 lbs
- Water – 1/2 cup
- Sugar – 1 cup
- Cinnamon – 2 (1
- Orange Extract – 2 drops
- Cloves – 4 pieces, crushed
- It’s been about 3 months since I made the jam and it is still tastes fresh.
- The same recipe can be used for other fruits like cherries, plums etc. Depending on the tartness of the fruit, you will have to add more sugar.
- Feel free to experiment with the spices; lemon juice + lemon zest can be used or you can also use cardamon, nutmeg, etc. Vanilla extract can also be used instead of orange.
Notes:
Directions
Before you start cooking, place a small plate in the freezer.
- Heat the oil in a large, heavy bottom pan.
- Clean and dry the fruit completely, so that there is no moisture. Pit the apricots and save a few of the seeds. (Note: You can extract the kernel out of these seeds and add it to the jam jar for additional flavor).
- Place the apricots in a non-reactive thick-bottomed vessel. Add water and stir every once in a while so that it doesn’t stick to the bottom. The fruits will slowly start to cook and become tender.
- At this stage, add the sugar and continue to cook in simmer. If you see foam rising to the surface, skim it off the top. Continue to stir as the mixture thickens and reduces to a thick jelly-like consistency. It takes about an hour to get to this stage.
- Now, get the plate from the freezer add a few drops of the jelly and return it back to the freezer. After a couple of minutes, take the plate out to check if it is done. Nudge the jam a bit with your finger; the jelly should form wrinkles and mound at the other end. If not, continue to cook and stir. Rinse and repeat the test after a few minutes.
- When done, turn the stove off and add the spices + orange extract. And then ladle the jam into clean jars (with kernel, if you have them saved). Store them in the refrigerator once they have cooled down to room temperature.